Monday 1 April 2024

Work In Progress....March 2024

In which I talk about my painting, modelling and gaming experiences from the month and write a bit.

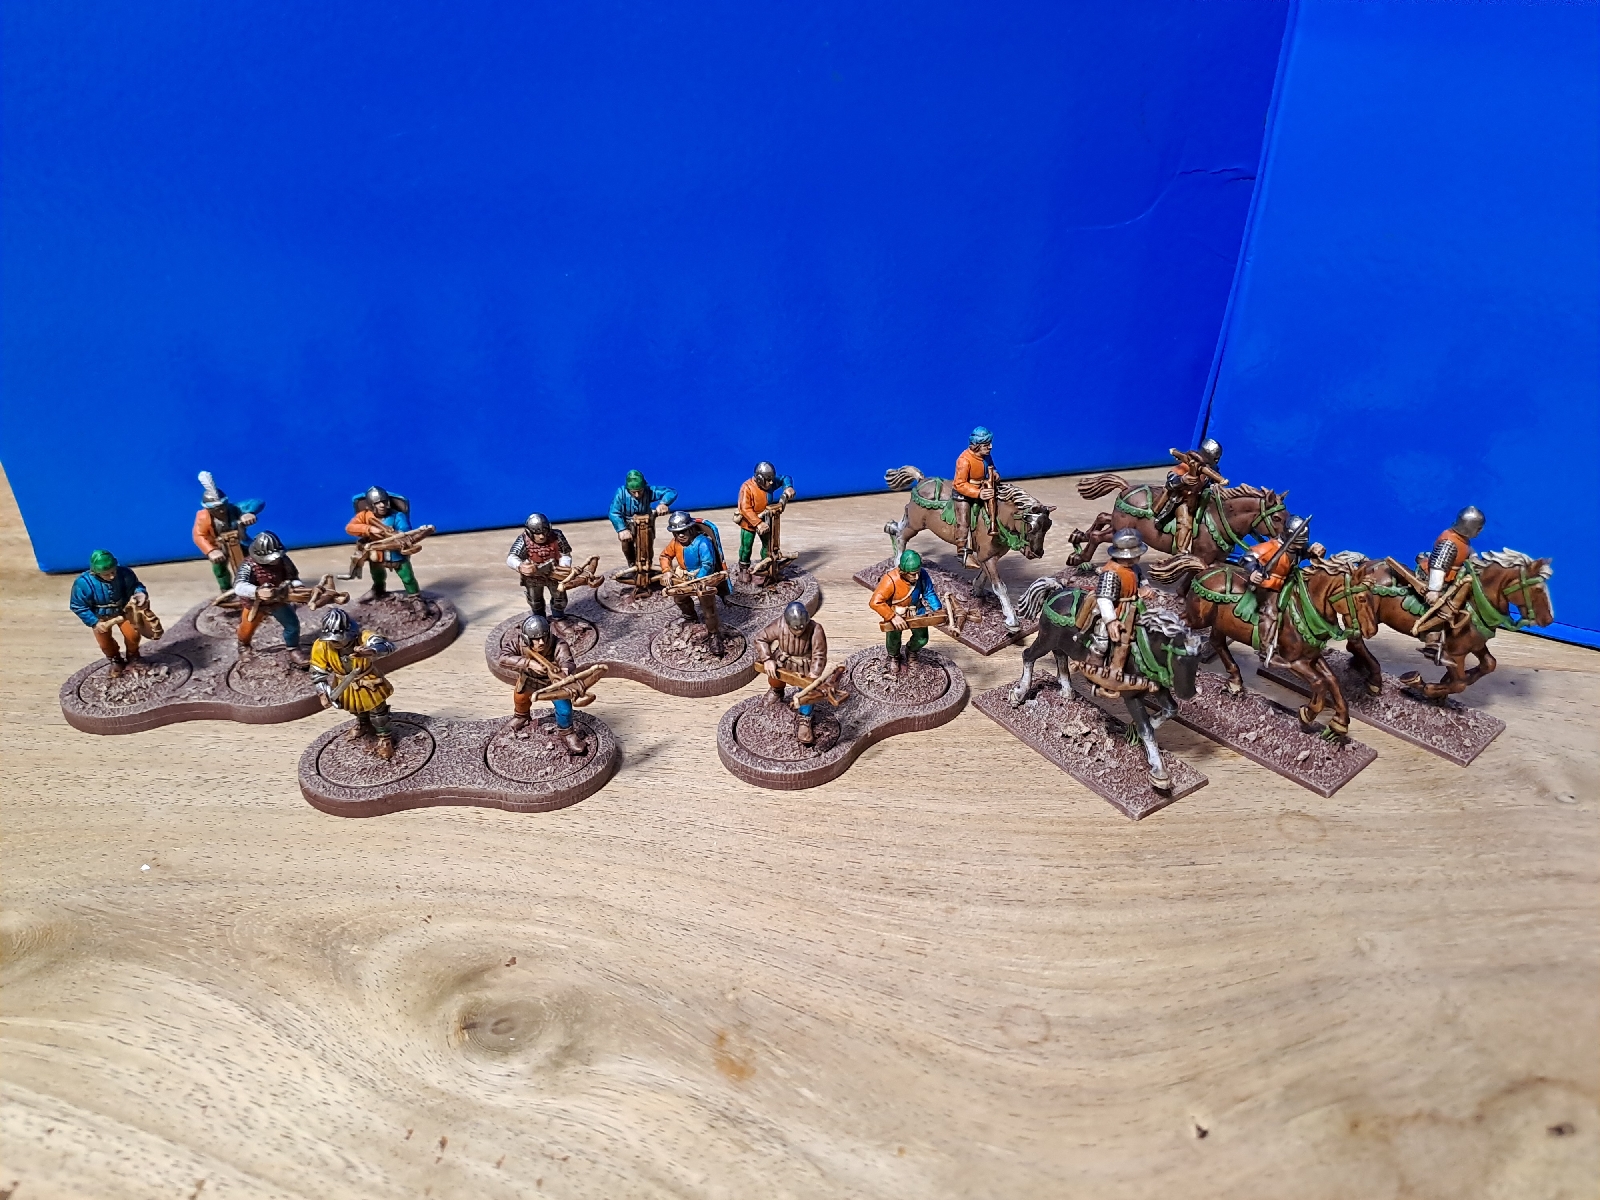
It's all Wars Of The Roses (WOTR) at the moment, I've settled into a groove, feel like I'm achieving something worthwhile, and turning out a decent number of units.  I've also shed my need for perfection and it's speeding me up and relaxing me with my painting.

In the last month I've polished off my Crossbowmen, handgunners and a bunch of light horse to go with my heavy horse!

In terms of gaming the English Civil War bits came out at Ben's request, and he promptly ground out a fairly entertaining pikemans lament punch-up.  

Next up is The Big One: my WOTR pikemen. The biggest unit in terms of models in the army; 18 men in total. I've also primed Richard III for some variety.


Saturday 30 March 2024

Big Green Men On Big Green Horses

Something I did a few months ago but didnt get round to writing about.....I was given a boxed set of crusader-esk knights for a birthday a while back (years, and years....), and didn't have an army to slot them in to. I decided they would make a decent addition to my Undead, and in the garage they stayed waiting for that day.

I've been looking for different things to make and paint recently and they jumped out at me.

I built them as per the plans, carefully making sure they ranked up into two lines (and then failed to mark them so I now can't remember exactly how they went....).

I had intended to paint them dark and brooding, but had a late idea of going all luminous green and ghostly. It would provide an unusual appearance and be completely different to paint. It would also be quicker than trying to paint all the horses tack etc because I intended to drybrush various shades of green so horses and riders looked the same.

An undercoat of brown was followed by a drybrush of white to make the green stand out. I went with a green speed paint, then a green wash (old GW orc flesh I think!), then 2-3 drybrushes of green, with a bit more white added in each time to gradually lighten the colour.  

I experimented with a gloss varnish hoping for a shiny ghostly effect, but it didn't work so replaced it was a matt varnish. I did try transfers for the first time since.....hmm. They went on ok despite their great age (GW men at arms transfers from circa 2006), but a number had a white residue around the edges. I'm not sure if that was due to the age, or the application.  

And done.  They even got some grass on the base and a few of Jessica's red flowers for colour, hopefully they don't look too happy and bright, they are supposed to be the baddies after all.....

Sunday 24 March 2024

Wars Of The Roses - Part 9 - In Which I Paint Some Crossbowmen And A Horse!

As above. I've done a few men at arms at the same time, and felt up to working on the first of my horse; 5 light horse in this case, having avoided the 24 heavy horse I've got still.
You may notice the lack of grass on the bases - I'm going to flock en-masse at some point.

Sunday 17 March 2024

Wars Of The Roses - Part 8 - Arrows & Iron Balls

First arrows.  Many, many arrows.  In the Never Mind The Billhooks rules the bow-armed units have a limit of 6 looses of an arrow each game.  It can be quite nasty, especially when you can loose twice in a turn, however, it's also can run out sharpish.  

To keep track of this sharpish situation a marker is recommended, and having looked at others suggestions and recommendations I settled upon the following effort; a round base with a dice slot/square on it, most of which have some arrows to show it is an arrow counter.  The effect is finished off by a mini 6 sided die, my colour of choice being green (not mint, just normal green).

The usual sand was added and brown spray used before painting the base the same as my other WOTR figures, and the arrows painted a suitable sandy and white combination followed by a strong tone wash and a bit of dry brushing to strengthen the colour again, nowt fancy.  A matt varnish over arrows and base finished it off.  I don't usually varnish a base, but there's so little to use to pick it up each time that I thought it worth doing.  They still need some flock but I'm saving that for a Big Flock Day along with other WOTR bits.

On to the iron balls, and it's my one piece of ordinance from the period.  I gradually worked on it to break up the monotony of many billmen.  I'd seen an example online of someone painting their piece green and liked it, I think mines come out OK. The crew I wasn't sure whether to go uniformed or all the colours of the rainbow.  In the end rainbow it was.

Sunday 3 March 2024

Wars Of The Roses - Part 7 - The Broken Made New

My original Wars Of The Roses models are plastic and date back around 12 years. In that time they have been out, not only for a battle or two against like minded individuals, but also to satisfy my sons wargaming interest. Unsurprisingly the latter caused casualties in the billmens billhooks department.  A couple of the mounted men at arms also took a hit but I have yet to find the heart to look at those.

I had replaced the broken arms amd weapons with new ones, giving an unpainted grey look to otherwise painted figures. I took the opportunity of being in WOTR painting mode to finish these off, with a brown primer followed by varying colours, trying to for in with the original painting style I had used. My current painting style and techniques are for brighter, clearer colours.  Billmen fixed, and added to the growing pile of WOTR infantry, now if only I wasn't scared of painting horses.....

Monday 12 February 2024

Wars Of The Roses - Part 6

Just as it began to look safe to come out from behind the sofa....bang! Another Wars Of The Roses post swam into view.  Part 6 follows almost exactly three years after Part 5, and approximately eleven and a half years since Part 1.

Having spent too long doom scrolling (is that a phrase?) and watching rubbish in the evenings on my phone I decided I'd like something constructive instead and out came the Wars Of The Roses.  Originally I was building a Yorkist army, but now I'm just building a generic army I can split into two when I want a game.  

In the last few weeks I've managed to paint a unit of bowmen and one of men at arms, although they are awaiting the final touch of some green flock and perhaps a flower or two on their bases.  

Having done the usual brown leather undercoat I gave them a dry brush of matt white to help the brighter colours I was planning to stand out.  I've been buying a few speed paints, most of which work quite well, especially over a white base, and used these for the browns and red (note: the 'Holy White' did not work so well - just came out grey).  

For the armour I used a coat of leadbelcher, then an Army Painter dark tone wash, before drybrushing in shinning silver.  A bit of red brown and sandy colours for the belts and weapon handles was covered in the Army Painter strong tone wash and highlighted, and the skin with a flesh speed paint and wash, and some gold bits to give a bit of variety and colour.  Everything was finished off with a gloss varnish on the metals, and a matt varnish on the more natural materials and it was done.  The bowmen had a few more colours including a yellow and green, but all done in the same way with paint+wash+highlights.

Overall reasonably pleased with them, now on to the next couple of units.


Thursday 25 May 2023

Lord Flashearts Fabulous Coach

A few years back a somewhat marvelous model turned up on my birthday. It was the Warlord Games pike and shotte period coach, and it was lovely, although a bit daunting and so I put off looking at it for quite a while.  And then a bit longer. And then a few years after that.....

Moving on I was putting together the Black Coach and a couple of skeleton chariots and decided to use the experience to work on the coach at the same time. All four were made and based at the same time, but the pine and shotte coach was by far the biggest so it received its paint job last.

The build - The model was a combination of metal for the most part with a resin cab (and roof), and it's length and limited connections between parts - especially the horses to the traces - provided some issues.  An Eons Of Battle (youtube) tip for adding bicarb of soda to superglue to fill gaps and make it dry swiftly helped,  as did some green stuff in a few critical spots.  I made a base out of thick plasticard, only to discover it flexed under the weight, so I braced it with long straps of the same plasticard, hoping to disguise them with sand and flock on the base at the end.  The bracing did work however.

Painting - I gave it a rattle can spray of brown before painting the base (drybrushing the base) before moving onto the tricky bit, the actual painting. I had a few rough ideas on colours, but when it came to it my inspiration fled into a dark corner and I mostly followed the box art.  I find horses tricky so I focused on the Carriage itself first, driver, and its two passengers.  The passengers and their baggage I painted separately before sticking in at the end.

For painting I dry brushed most of it lightly in white to make the colours stand out, then I did a fair amount of blocky base colours before following up with a wash and then a highlight/dry brush. The red on the coach was the exception, it just looked right straight away so I left it.

Final stage - the flocking and varnishing. Flocking went ok, didn't hide as much of the strengthening struts on the base as I would have liked, but I also used some flowers and overall I felt it finished nicely. I went for a spray varnish, and not having used it for best part of 2 years I overdid it on the roof and caused some damage that had to be repainted, but the massed dreaded cracking didn't occur, amd after the first paint fix it was done.